![features pcfree1 iOS 5 Wireless iPhone Activation [video]](https://lh3.googleusercontent.com/blogger_img_proxy/AEn0k_v11ugQDjHNYALXUh13DWITDw16R4xWGTZFmd491aaLSzVCBjfniT1uHe2Oa-umzV3JLfOvHPdJTqFv6qIkLh7Kh0M1B0e94UswxemWx8AEBR2D1NNbCI6nVVjgw4vFR-1HJwcH98yrbXKLhjlly9aCB8A=s0-d "features_pcfree")
With iOS 5, you no longer need a computer to own an iPad, iPhone, or iPod touch. You can activate and set up your device wirelessly, right out of the box. Wonder how it works? Take a look after the jump…
More on iOS 5 here…
![activation1 iOS 5 Wireless iPhone Activation [video]](http://cdn.funkyspacemonkey.com/wp-content/uploads/2011/06/activation1.jpg "activation1")
![activation2 iOS 5 Wireless iPhone Activation [video]](https://lh3.googleusercontent.com/blogger_img_proxy/AEn0k_tjafOHC_9X-NkhyEV0JLfMmNYGy5xrp3fyZuiinf_8XUPJQNsHwEMN0xM5y2Swp33nbPyo1Zn3gNTXpXwAgtSlmBGEwQ8S_ph_2DIje-6g7kk-5e9hlTbw_a4XekscWIkNvGAeYTKg2wgRFVA=s0-d "activation2")




jailbroken 4.2.1 by redsn0w with a 6.15.00 Baseband
Heres what I did:
Jailbroke Iphone via redsn0w
Opened Itunes 9.0.3
Opened mughalGs Iphone Unlocker IPhone Unlocker 4 BB 6.15 [nowifi].rar
Clicked Get it
Reset phone 2 times
and DONE!
For those that not get to work.
=======================
Download ifunbox
connect your iphone and open ifunbox.
click on "Rawfile system"
open VAR
open root
open media
If it is empty..make new folder.named"Cydia"
open Cydia ..
IN "cydia" folder make another folder named:AutoInstall"
IN :AutoInstall" folder past ultrasn0w files(First extrac it then Past)
REboot 2 time..
ENjoy
The ultra sn0w files are here:
ulrasn0w.6.15 by zain.rar - 4shared.com - online file sharing and storage - download
UPdated
Iphone Unlocker NoWifi V 1.1 beta by MughalG
Iphone unlocker [NoWifi] has been updated to support latest Itune versions.
Whats New:
* Supports all Itune versions
* Ultrasn0w updated to latest version 1.2.3 to support firmware upto 4.3.3
Download link:
IPhoneUnlocker.rar
Apples iPhone 5 event scheduled to begin at 10:00 AM Pacific Time. The event invitations carry the tagline "Lets talk iPhone"We’ve just gotten word that Apple will be holding an event on October 4th — most likely to announce the next version of its wildly popular iPhone. But who knows what else is in store? Based on the invite (the image above), it’s likely that Tim Cook and company aren’t going to be dipping into too much else, so don’t let your imagination go wild.
Apple didnt announce what exciting secrets could be in store. I cant wait - check out event time based in your city time zone - Here.
Apple has officially announced that its holding the iPhone 5 event on October 4th. Apple started to send invitations for iPhone 5 event at the companys Town Hall auditorium at its headquarters in Cupertino, California. The event scheduled to begin at 10:00 AM Pacific Time. In the below schedule, we have converted this time for all countries and cities worldwide. Check the time of Apple iPhone 5 event according to your city after the jump.


iOS 4.3.5 was recently released by Apple to fix a security issue with certificate validation.Thankfully Redmondpie Team has cooked a custom PwnageTool bundle that will allow you to jailbreak iOS 4.3.5 and Preserve Baseband unlock. Heres what you will need:
- iOS 4.3.5 IPSW for iPhone 4 [Download]
- iTunes 10.4 [Download]
- PwnageTool 4.3.3 [Download]
- PwnageTool Bundle [Download]
- tethered-boot utility [Download]
Warning:
If your baseband is 4.10.1 Do not update to iOS 4.3.5 as there is no unlock for it now. Modify PwnageTool For Custom BundleStep 1: extract the custom bundle we mentioned above and drag it to your desktop.
Step 2: drag the PwnageTool app to the /Applications folder but do not launch it yet. Instead, right-click it and select Show Package Contents, in order to insert the bundle. For reference, check out the screenshot below. Step 3: you should now see a Finder window identical to the one below. Navigate over to Contents/Resources/FirmwareBundles/ and place the .bundle file you had selected earlier to this location, then close the window.
 Creating Custom 4.3.5 Firmware
Step 4: start up PwnageTool in Expert mode, as shown on the screenshot below. Select the device you’re using, then click on the blue arrow on the bottom-right corner of the window to proceed. Step 5: when requested, point PwnageTool to the iOS 4.3.5 IPSW file you downloaded earlier, as shown in the screenshot below.
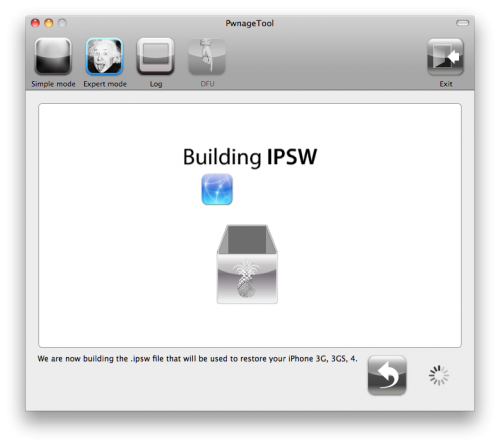
 Step 6: on the next screen, you’ll be given the option to further customize the software you’re about to build. Feel free to toy around with these settings, but only if you know what you’re doing. If you’re not sure what to do, just click on "Build" as shown below. PwnageTool will then build a jailbroken firmware, a process that could take a few minutes, so kick back and have a soda.
 Step 7: when instructed, you need to put your phone into DFU mode. Just do as follows:
Hold down both the Power and Home buttons simultaneously for 10 seconds.
Release the Power button but keep holding the Home button for 10 more seconds.
If your screen is black, you’re in DFU mode. If an iTunes logo is displayed, you’re in Restore Mode: just try the steps above a few more times, sometimes it doesn’t go well on the first try. Nonetheless, a notification will be displayed if you’ve managed to enter this mode correctly. Restoring Custom 4.3.5 Firmware On iPhone
Step 8: once this process is done, you’re free to exit out of PwnageTool. Now launch iTunes and restore to the firmware file you’ve just created: select your device from the iTunes sidebar, and click Restore while holding down the Alt key on your keyboard. Select the firmware file you’ve just saved (make sure it’s the one created by PwnageTool, not the default firmware) and click Open. iTunes should now begin loading the jailbroken firmware to your device, avoid interacting it at this point. If everything goes as expecting, your device should be jailbroken at this point. Booting iPhone In Tethered Mode
Since this is a tethered jailbreak, whenever you boot up your device you’ll have to plug it into your computer and run a small utility known as tetheredboot. You’ll need to follow the following Step 11 and Step 12 whenever you start up your device!
Step 9: place tetheredboot (download link at the beginning of the article) in an accessible directory.
Step 10: change the extension of the custom IPSW file you’ve just created to .zip by renaming the file, then extract it much like a real ZIP file. Navigate to /Firmware/dfu/ and copy two files (kernelcache.release.n90 and iBSS.n90ap.RELEASE.dfu) from that directory to the folder you’ve pasted tetheredboot utility into, as shown below. Step 11: with your device plugged in but turned off, bring up the Mac OS X Terminal (by heading to Applications/Utilities/Terminal), type in the following commend, press enter and insert your password when requested:
sudo -s
Then type in the following:
/Users/TaimurAsad/Desktop/tetheredboot/tetheredboot
/Users/TaimurAsad/Desktop/tetheredboot/iBSS.n90ap.RELEASE.dfu
/Users/TaimurAsad/Desktop/tetheredboot/kernelcache.release.n90
if the commands above don’t work, try the following:
/Users/TaimurAsad/Desktop/tetheredboot/tetheredboot –i
/Users/TaimurAsad/Desktop/tetheredboot/iBSS.n90ap.RELEASE.dfu -k
/Users/TaimurAsad/Desktop/tetheredboot/kernelcache.release.n90
Important: Make sure you replace /Users/TaimurAsad/Desktop/tetheredboot/ with the directory where you have placed the tetheredboot utility. If you’re not comfortable typing in commands, you can simply drag the 3 files in your tetheredboot folder right into the terminal window after the original sudo -s command.
Step 12: after some code runs through the terminal, you’ll be asked to set your phone into DFU mode. Do so, as shown below:
Hold down both the Power and Home buttons simultaneously for 10 seconds.
Release the Power button but keep holding the Home button for 10 more seconds.
If your screen is black, you’re in DFU mode. If an iTunes logo is displayed, you’re in Restore Mode: just try the steps above a few more times, sometimes it doesn’t go well on the first try.
If you wait a few seconds, you should see “Exiting libpois0n” on the terminal. Your device is now in a jailbroken state until next time you power off.
As you know that Apple has released iOS 4.3.5 to fix security issue. The good news is that some guys have confirmed that current Redsn0w version can jailbreak 4.3.5 iPhone 4, 3GS, iPod Touch 4G, 3G, iPad 1.
As we reported you that this jailbreak is still tethered jailbreak which means that you will need to reconnect your iDevice with computer every time your reboot iDevice.
[h=2]Jailbreak 4.3.5 iPhone 4, 3GS, iPod Touch 4G, 3G, iPad:[/h]Step 1: Download iOS 4.3.5 and iOS 4.3.4 (required by this version of Redsn0w) firmware file for your device from the links given at the end.
Step 2: Download Redsn0w 0.9.8b4 for Windows or Mac. Also make sure you are running the latest version of iTunes, which is version 10.4.
Step 3: Now start Redsn0w, browse for the iOS 4.3.4 firmware file (NOT the 4.3.5) that you downloaded in Step 1 and point it towards Redsn0w. Refer to the screenshots below:
Step 4: Once Redsn0w is done recognizing the firmware file, click Next and there you’ll be taken to a new window. Simply check the “Install Cydia” box as shown below and leave other options as it is for now. Once done, click Next.
Step 5: On this screen, Redsn0w will instruct you to power down your device and plug it in to your computer. Follow the onscreen instructions and then click Next to continue.
Step 6: On this screen you will have to put your device in DFU mode with a combination of the Power button and the Home button for a certain amount of time, simply follow the onscreen instructions on how to do so. The combination is usually like this:If you performed the above mentioned steps correctly, then your device should be in DFU mode.
- Hold down Power button for 5 seconds.
- Now without releasing the Power button, hold down the Home button simultaneously with the Power button for 10 seconds.
- Let go of the Power button but keep on holding the Home button for another 15 seconds.
Step 7: Redsn0w will now jailbreak your device, don’t do anything weird at this point, just let Redsn0w finish. We would recommend that you don’t do anything with your PC or Mac at all during the process. Sitting idle and waiting for the process to end on its own is much advised.
Since this is a tethered jailbreak, therefore whenever your iOS device loses power, it will go into the dreaded Apple logo boot screen loop. To get out of that, simply start from Step 3 again and in Step 4, uncheck “Install Cydia” and instead check “Just boot tethered right now” option and hit “Next” with your iPhone, iPad or iPod touch connected to your PC or Mac. And yes, you will have to do this every time when your device reboots or loses power.
That’s it! You should now have a jailbroken iPhone, iPad, or iPod touch running iOS 4.3.5.


Got an untethered iPhone 4 running iOS 5.0.1. Feel free to update.Pod2g has previously warned users from upgrading to iOS 5.0.1 and give him time so he can use the discovered security flaw found in iOS 5.
It’s finally here folks, the official downgrade tool for A5 devices!
Starting with redsn0w version 0.9.11b1, those with newer devices (iPad2, iPad3, and iPhone4S) can join the downgrade fun too!
In a radical departure from previous versions of redsn0w, it now directly supports restoring IPSWs to your device. The first use of this new feature implements a hack that allows A5 downgrades without a bootrom-level exploit.
Indeed, you can now downgrade your iPhone 4S, iPad 2, or new iPad (iPad 3) with the latest version of RedSn0w 0.9.11b1. Downgrading will allow you to perform an untethered jailbreak on your iPhone 4S, or iPad 2 running iOS 5.0.1 firmware.
Check out our tutorial for the step-by-step downgrade instructions inside…
Note: You must have your SHSH blobs for iOS 5.0.1 either stored locally by means of TinyUmbrella, etc., or Cydia must have your 5.0.1 blobs for this downgrade to work successfully.
Step 1: Download the latest version of RedSn0w 0.9.11b1 RedSn0w 0.9.11 beta 1: Mac • Windows
Step 2: Download the latest firmware (5.1.1) for your device from our downloads page, along with the 5.0.1 firmware.
Step 3: Place your device into DFU mode.
Step 4: Run RedSn0w 0.9.11b1, and make sure RedSn0w detects your device in DFU mode. Navigate to Extras > Even more > Restore and click IPSW under the IPSW section. RedSn0w will then ask you for your iOS 5.0.1 IPSW. Once you locate iOS 5.0.1, RedSn0w will ask your for the latest firmware (iOS 5.1.1).Step 5: Once both firmwares have been validated, it’s time to locate your saved SHSH blobs. If you’ve jailbroken your device before, you should have those available on Cydia, and therefore you can use the Remote option. If you’ve never jailbroken your device before, but you saved your SHSH blobs with a tool like TinyUmbrella, then choose Local and browse your computer for your blobs. We’d recommend clicking the Remote option first.Step 6: Once your blobs have been verified, there is nothing left for you to do, just let RedSn0w execute the full process. First RedSn0w will install a hacked version of the latest firmware (iOS 5.1.1), and then it will downgrade your firmware to iOS 5.0.1.
Step 7: Upon downgrading successfully you will be presented with a success message. Now all you have to do is setup your device, and verify that you are now on iOS 5.0.1 via Settings > General > About on your device.What’s Next?
Most people will want to jailbreak their newly downgraded device. If you’re using an A5 device like the iPad 2, or iPhone 4S, you can now jailbreak using Corona-A5. You can do this directly from RedSn0w. We will have a tutorial that shows you how to jailbreak your A5 device using RedSn0w in the near future. Until then, you can always use a tool like Absinthe Absinthe v0.4: Mac - Windows - Linux to jailbreak as well.
Were you able to downgrade successfully? Have any tips or tricks? Please share them below!
Important: If you rely on a software unlock or SIM interposer for your iPhone, beware! This method will update your baseband, and you could permanently lose your unlock.


Its been less than 2 days and iOS5 is already cracked! Non developers can now install the iOS 5 beta on their iPhones.
This backdoor uses a security exploit in the activation screen.
How to upgrade to iOS 5 for iPhone 4,3GS ,iPod touch 4G, 3G and iPad 1, 2:
Step 1: Download the iOS 5 IPSW file for iPhone 4 and iTunes 10.5 -
Step 2: Install iTunes from the downloaded DMG file.
Step 3: Update your phone with itunes by connecting it and clicking on the "Check for Update" button while holding down the Option key (Shift on a PC). Select the iOS5 IPSW you just downloaded and confirm.
How to Activate iOS 5 without developer account
Step 1: Triple click the home button to activate Voice Over
Step 2: Triple click the home button and Emergency Call will appear.
Step 3: Click on Emergency Call and, while its switching, swipe with your three fingers down.
Step 4: The Notification Center will appear!
Step 5: Click on the Weather widget and wait for the weather app to load.
Step 6: Click on the home button to exit to the iPhones springboard.
There you go! Your iPhone is now running iOS 5.